

Saturday, March 31, 2012

March 28 Photo a Day Challenge - Animal
 |
| My neighbor's boxers. From left to right: Weezy, Zeplin, Lily May |
Franklin County Area Photographers: March Scavenger Hunt Winners
I was quiet surprised to see that I won two categories! Check out the winners' photos!
Franklin County Area Photographers: March Scavenger Hunt Winners: I know you have all been waiting anxiously to hear the winners of our first scavenger hunt. I have really enjoyed browsing through the image...
Franklin County Area Photographers: March Scavenger Hunt Winners: I know you have all been waiting anxiously to hear the winners of our first scavenger hunt. I have really enjoyed browsing through the image...
Friday, March 30, 2012
Catch of the Day - Recipe
I sooooo wish I had a photo for this recipe, but I totally forgot to take one the last time I made it!! GRRR! Sorry fans!
My hubby is big into fishing ... it is probably his favorite hobby next to hunting. He's goes fishing quiet frequently. We usually freeze his catch and then have a big fish fry with our close friends in the summer. From time to time, though, he will clean it and have me cook it the same day.
Here's the big thing that you need to know ... I HATE ALL SEAFOOD AND FISH! Apparently, though, my pan fried fish is amazingly delicious! I wouldn't know because in all honesty I have never eaten it. My husband and children rave over it and can devour a huge tray of it in one meal! I am going to share my secret with you.
So, you of course need to clean and filet your fish. I don't do this part ... it's hubby's job ;) I really never even know what kind of fish it is that I am cooking. It is most likely bluegill and crappie most of the time. Keep in mind that you will need to adjust amounts according to how much fish you are cooking.
Lightly beat 2 farm fresh eggs in a shallow dish. In another shallow dish combine 1 cup of flour and 1 cup of yellow corn meal. Season to your taste with salt, pepper and paprika. Combine well. Warm about 1/2 to 1 inch of coconut oil over medium heat in a skillet with deep sides. (Notes on this ... more fish = more oil that's why I put the range there, heat will need to be adjusted to your stove but coconut oil in my experiences needs to cook at a lower temp than vegetable or canola oil)
Dip the fish in the egg and coat on both sides, then coat in the flour/corn meal mixture. Pan fry until golden on both sides ... about 5 minutes per side (again it will depend a little on how your stove cooks). Fish cooks very quickly and it is VERY important not to over cook it. When cut open it should be white and a little flaky. Eat it while it's hot!!
Wednesday, March 28, 2012


March 25 Photo a Day Challenge - What's on Your Feet
 |
| Little confession ... I didn't actually take this one on the 25th. Sorry! |
Sunday, March 25, 2012
March 24 Photo a Day Challenge - Colorful
 |
| I found this tulip at the bank. All of the rest were the red-orange color ... only this one had the yellow in it. |

Coconutty
Ok, I admit that I could not think of a great title for this post. I wanted to review my use of coconut oil over the past month. As you, hopefully, know my March commitment was to use coconut oil in place of canola. I found a great price on Amazon and got free shipping and a subscribe and save discount. I'm just going to make a bulleted list of my thoughts because they are not very cohesive when put together as an article.


- I noticed that I do not use near as much oil as I thought I did. That is great news! I had to go back and change my subscription settings.
- It adds no coconut flavor to my food. Actually, I do not get any of that dense, oilyness at all!
- My favorite uses: grilled cheese instead of butter; I pan fried some breaded fish (hubby caught it the same day ... I'll put up a recipe).
- My kids didn't seem to like their scrambled eggs cooked in coconut oil. I can't eat eggs, so I'm not sure if the flavor was different or if it had more to do with the eggs.
- Haven't tried this just yet, but I was told to make popcorn in my WhirlyPop with coconut oil and it will be the best I've ever had.
- Coconut oil is barely solid at room temperature ... I cook at a lower temperature when using it.
- I have not used it an any baking yet.
Friday, March 23, 2012


Wednesday, March 21, 2012
March 21 Photo a Day Challenge - Living Room
 |
| This is a window in my living room. Sorry, I won't show you the rest ... Hurricane Kaitlyn made landfall and there are toys everywhere! |
Fresh Berries - A Smart Fridge Solution!
Pinterest ... have you heard of it?! LOL I love Pinterest! I have gotten so many great ideas, recipes and inspiration from it! You can follow me by clicking on the button to the right side of the screen.
One day I came across a way to prevent your fresh berries from getting moldy in the refrigerator. I pinned it but hesitated to actually try it. Yes, berries tend to mold very quickly once I get them home, but I just wasn't sure about this "technique".
The idea is from Food Lush. It says to wash them in a mixture of 1 part vinegar to 10 parts water. It is supposed to kill bacteria that causes the mold. Let me tell you ... I NEVER wash my produce until I am ready to use it. Introducing moisture to the produce can promote the growth of mold. I finally tried it ... and it worked! I'll tell you exactly how I did it.
- In a large bowl I combined 1/2 c. white vinegar with 5 cups of water.
- Next, I set the little plastic basket-like container of berries into the bowl. (Let me explain my rational here ... I figured that there is a reason why they use those specific packages for the berries and thought it would be best to continue to store the berries in them. Then I thought, well if I wash the berries and not the container ... the bacteria is still in the container and will recontaminate the berries ... thus I chose to wash the container too.)
- Then, dump the berries into the bowl and set the container to the side to dry. Swish the berries around in the water/vinegar mixture.
- Finally, I used a slotted spoon (you could drain in a colander too , but I do large batches at a time) to scoop out the berries and return them to their containers.
- You could pat them dry on a paper towel, but I was afraid of introducing new bacteria so I chose not to. Also, you can rinse the berries after washing the solution, but the amount of vinegar you use truly does not leave any flavor on the berries.
Tuesday, March 20, 2012

Photo Scavenger Hunt Entries - March
I participated in a photo scavenger hunt with the Franklin County Area Photographers blog. It was a lot of fun interpreting the words and scouting them out! I did not complete all 10 categories, but I had so much fun ... it doesn't even matter! Here are my entries:
 |
| Green |
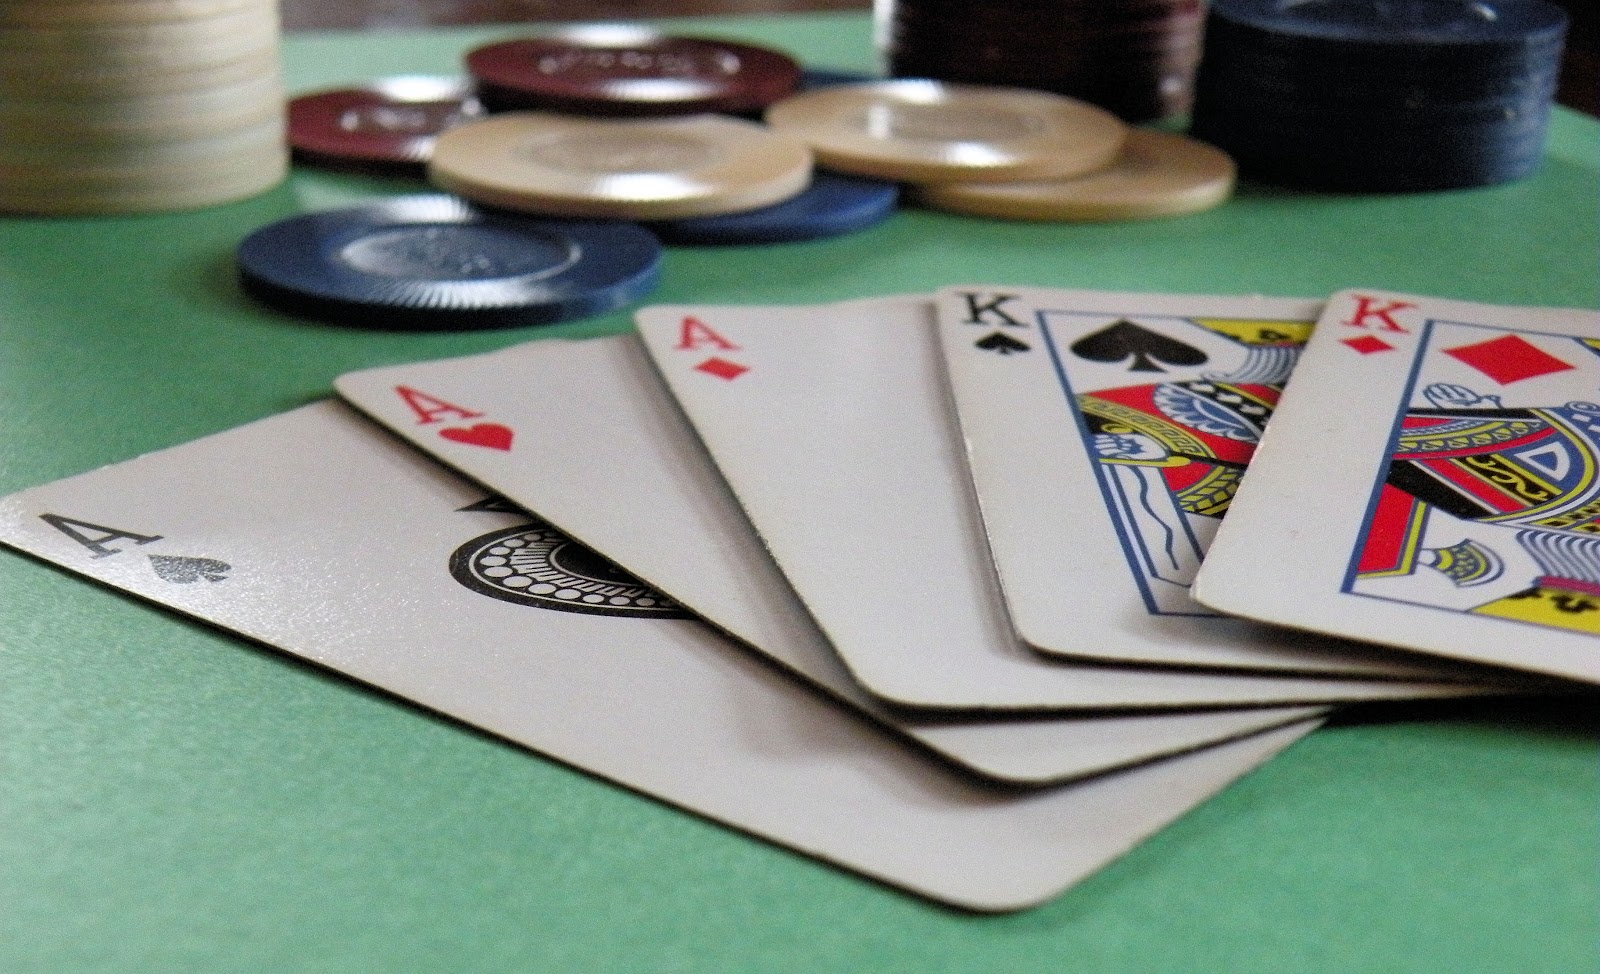 |
| Money |
 |
| Shadow |
 |
| Signage |
 |
| Square |
 |
| Stranger |
 |
| Time |
 |
| Top |
 |
| Unfinished Business |


March 16 Photo a Day Challenge - You
 |
| Me on the left ... you might recognize the woman on the right as Michelle Duggar! :) |

March 14 Photo a Day Challenge - Something in Your Front Yard
 |
| A stepping stone that my sweet little Madelynne made :) |


March 10 Photo a Day Challenge - Something that Sparkles
 |
| A Girl Scout "SWAP" that my daughter received |


I Have Not Forgotten ... Promise!
I realize I have not posted in a very long time. No, I did not start a blog and then decide I didn't want to do it anymore. Life got in the way. It happens from time to time. My kids were sick, then I was sick, and finally my grandma passed away.
I hove lots of stuff that I want to post and now that all of the "commotion" is over, I will get up to date! Thanks for waiting for me!
I hove lots of stuff that I want to post and now that all of the "commotion" is over, I will get up to date! Thanks for waiting for me!
Thursday, March 8, 2012

Kony 2012
KONY 2012 from INVISIBLE CHILDREN on Vimeo.
I will be praying over this cause and doing what I can to spread the word and support them.
Tuesday, March 6, 2012
Whipped Cream
In this house, we love whipped cream! On top of ice-cream, fresh fruit ... the list could go on. Have you ever read the ingredients? This is the ingredient for a spray can of whipped cream (I will not list the brand):
I always have a pint of heavy whipping cream in my refrigerator. I use it for cooking and for my coffee in a pinch. I pint costs around $2-$3 and is equivalent to about 2 cups, but when it's whipped you will get about double that amount or more.
You Will Need:
1 cup heavy whipping cream
3 T sugar
1 t vanilla extract
2 bowls that will nest inside of each other, I would recommend that the smaller one be glass
Ice
Whisk or hand mixer
Make It:
Place ice in larger bowl and place smaller bowl inside, making sure that the ice is surrounding the smaller bowl but not falling into it. If you have one of those nifty, silicone trivets it would be helpful to set your bowls on it. You could also use a metal bowl that has been chilled in the freezer for 15 minutes or so.
 Pour cream, sugar and vanilla into the bowl. Then ... whisk! If you don't need the work out, then use your electric hand mixer :) You could also use a stand mixer if you have one. It does take several minutes. One of the reasons I like to whisk it by hand is that I feel that it would be easier to "over whip" the cream with and electric mixer. If you whip it too much it will separate.
Voila! You are done! It is lightly sweet and super smooth! Now enjoy it!!! This was our dessert, which we rarely ever have, tonight!

Heavy Cream, Sugar, Contains 1% Or Less of Each of The Following: Artificial Flavor, Mono and Diglycerides, Polysorbate 80, Carrageenan, Mixed Tocopherols (Vitamin E), to Protect Flavor, Propellant: Nitrous Oxide. Alelrgy Warning: Contains Milk. May Contain Traces of Eggs and Soy.What is half of that junk? Yuck! Here is the ingredient list for the freezer kind:
Water, Corn Syrup, Hydrogenated Vegetable Oil (Coconut and Palm Kernel Oils), High Fructose Corn Syrup, Less than Two Percent of Sodium Caseinate (from Milk), Natural and Artificial Flavor, Xanthan and Guar Gums, Polysorbate 60, Sorbitan Monostearate, Beta Carotene (Color).Geez Louise!!! Seriously!! Do you know how easy, quick and inexpensive it is to make whipped cream yourself? Well you are going to find out!
I always have a pint of heavy whipping cream in my refrigerator. I use it for cooking and for my coffee in a pinch. I pint costs around $2-$3 and is equivalent to about 2 cups, but when it's whipped you will get about double that amount or more.
You Will Need:
1 cup heavy whipping cream
3 T sugar
1 t vanilla extract
2 bowls that will nest inside of each other, I would recommend that the smaller one be glass
Ice
Whisk or hand mixer
Make It:
Place ice in larger bowl and place smaller bowl inside, making sure that the ice is surrounding the smaller bowl but not falling into it. If you have one of those nifty, silicone trivets it would be helpful to set your bowls on it. You could also use a metal bowl that has been chilled in the freezer for 15 minutes or so.

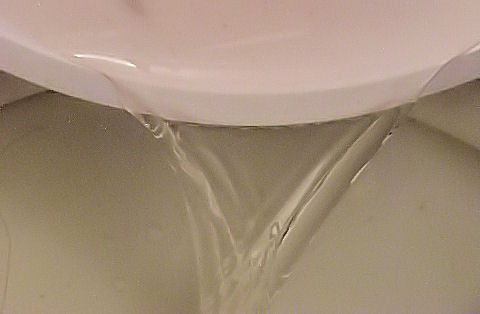
 |
| The cream forms meringue-like peaks and sticks to the utensil. |

March 6 Photo a Day Challenge - Chores
 |
| Well, I see about six chores in this photo! She's my little "chore maker". LOL |
Monday, March 5, 2012

Sunday, March 4, 2012
Little Mama's Kitchen Must Haves
I have been thinking about this post for a while now. What are the items that I find essential to my kitchen? Which items do I build my kitchen and recipes around? Where could a novice, home cook start?
I do not consider myself to be a master, home cook; more of an intermediate level. I love to cook, I have studied some of the sciences behind cooking, learned some techniques and practiced them ... a lot.
TOOLS:
You really don't need a lot of tools and gadgets to be a great cook. There are a lot of things that you can fill your kitchen with for convenience and ease, but they are not essential to great food. These are the tools that I feel are the most utilized and important in my kitchen:
APPLIANCES:
By this I mean aside from the obvious oven, range, refrigerator and microwave. I am talking about small appliances. I do not have a lot of them, but the few I do have get a lot of use!
So, that makes six kitchen must haves ... that's all! The other items are nice to have, but you can still make great food without them. Now, I'm thinking I should list my grocery list constants. Food items that I always keep on hand. That will be a different post on a different day.
I do not consider myself to be a master, home cook; more of an intermediate level. I love to cook, I have studied some of the sciences behind cooking, learned some techniques and practiced them ... a lot.
TOOLS:
You really don't need a lot of tools and gadgets to be a great cook. There are a lot of things that you can fill your kitchen with for convenience and ease, but they are not essential to great food. These are the tools that I feel are the most utilized and important in my kitchen:
- Good, Sharp Knife - Splurge a little here and you will be very glad that you did! I know, I know ... I felt like a crazy person when I first considered spending $20 + dollars on one knife! Oh My Goodness! It made such a huge impact!! My favorite is my awesome Santoku knife (Asian-style, multipurpose knife). I love, love, love it!! I can not imagine cooking with out it! Now, it is entirely possible to spend over $100 on one knife, I would not recommend that for a home cook. Mine was around $20 to $25 and works wonderfully!
 |
| This is my knife ... LOVE! |
- Plastic cutting boards - I would recommend having a separate one for produce, poultry, meat, cooked foods and fish. Wood and glass ones can look very fancy, but glass dulls your knives and wood are difficult to completely sanitize after use. Plastic cutting boards can be placed in the dishwasher and sanitized easily with out dulling your awesome knife. I like to idea of having separate ones for various items; it helps ensure that you avoid cross-contamination. I love ones like this (an inexpensive option) or this (a little fancier).
- A good quality, non-stick pan - You really just need one, really good pan. I have this 10" saute pan from Pampered Chef that I earned as a hostess reward for just $35. My loving husband washed it in the dishwasher a few times and now it's not so great anymore. It's still o.k., but it will never be restored to it's former glory. For Christmas I got a Paula Dean cookware set. The one I got had a few more accessories than the one I linked to, but the cookware pieces are the same. It's been a pretty good set for me, with proper care. I hand wash it and when I stack them in my cabinet, I place a square of that rubber, shelf-liner stuff between each pan.
APPLIANCES:
By this I mean aside from the obvious oven, range, refrigerator and microwave. I am talking about small appliances. I do not have a lot of them, but the few I do have get a lot of use!
- A food processor or blender - I know that they don't do the exact same thing, but the only use mine get are for puree and making smoothies. I have a plain old blender and a little miniature food processor. When it comes to chopping, dicing, mincing and slicing ... I'm a do it by hand kind of gal ... remember my awesome knife?!
- A mixer - I would recommend a good, sturdy stand mixer with a base that rotates the bowl, but a hand mixer is fine too. I rarely use my hand mixer and usually the only time I use my stand mixer is when I make frosting. Yes, I make my own, homemade frosting ... free of all the gross stuff that's in store bought. All of my other mixing I do by hand with a whisk. Yes, I do the whole 400 strokes thing ... it is just easier for me than getting out a mixer, setting it up and then cleaning up. One bowl, one whisk ... done. You should still have an electric mixer because most of you probably do not like the idea of mixing cake batter by hand for 400 strokes. If I had the Kitchen-Aid stand mixer that I want ... I would find reasons to use it! Love!
- A crock-pot - I use my crock-pot almost weekly! I love it! I have 3 different sizes, because I'm a lovely combination of OCD and crazy. You can cook endless meals in crock-pot and there are 3 ways to screw up the recipes: forget ingredients, set on wrong temperature and cook for wrong length of time. If you can read a recipe, these are easily avoidable. You can look like a rock star cook with crock-pot recipes! I roast a whole chicken in my crock-pot a few times a month and it is always amazing! Everyone that has eaten it has LOVED it!
So, that makes six kitchen must haves ... that's all! The other items are nice to have, but you can still make great food without them. Now, I'm thinking I should list my grocery list constants. Food items that I always keep on hand. That will be a different post on a different day.
March 4 Photo a Day Challenge - Tree
 |
| This tree is actually in my neighbor's yard. You can't tell right now, but it's a Redbud tree. What luck that there was a majestic little Robin perched on the branch! I can't wait for the Redbud trees to start blooming! |
March 3 Photo a Day Challenge - Black and White
 |
| I thought this turned out pretty cool. The original picture is of one of those "adjust your print settings" pages that the printer makes when you reset it. I just toyed with it a bit in Paint Shop. I wasn't happy with the look I was getting, the white paper kept looking grey. Since I am very amateur in using Paint Shop, I did not know how to fix this. I decided to make a negative image so that the lettering would turn white. I really like the way it turned out. |
Friday, March 2, 2012
March 1 Photo A Day Challenge - "Something That Makes You Smile"
 |
| This is the Phlox in my flower bed. Flowers make me smile, especially the first blooms of spring! |
My New Hobby
Recently, I started having a lot of fun taking pictures. I don't mean pictures of my family etc ... I mean "artistic" pictures. I am doing two challenges to help me develop my "eye" for great photos.
The first one I found via a friend on the Maternal Lens Facebook Page. The challenge is to take one photo per day inspired by the word that is listed for that day.
The second is a scavenger hunt (with prizes) from Franklin County Area Photographers. There are 10 categories and I have 3 weeks to fill each category with a photo.
I have been playing around with Photoshop, trying to figure out how to make my photos look better. Hopefully I can master that art too!
I will post my photo a day pictures for you all, but my scavenger hunt ones will be kept secret until the game is over! Wish me luck!
Subscribe to:
Posts (Atom)